


How to get started with airbrushing painting
Airbrushing painting is an amazing art form. It lets creators make stunning, realistic images with bright colors. If you’re an experienced painter or a beginner, learning how to do airbrushing painting can open up a new world of creativity.
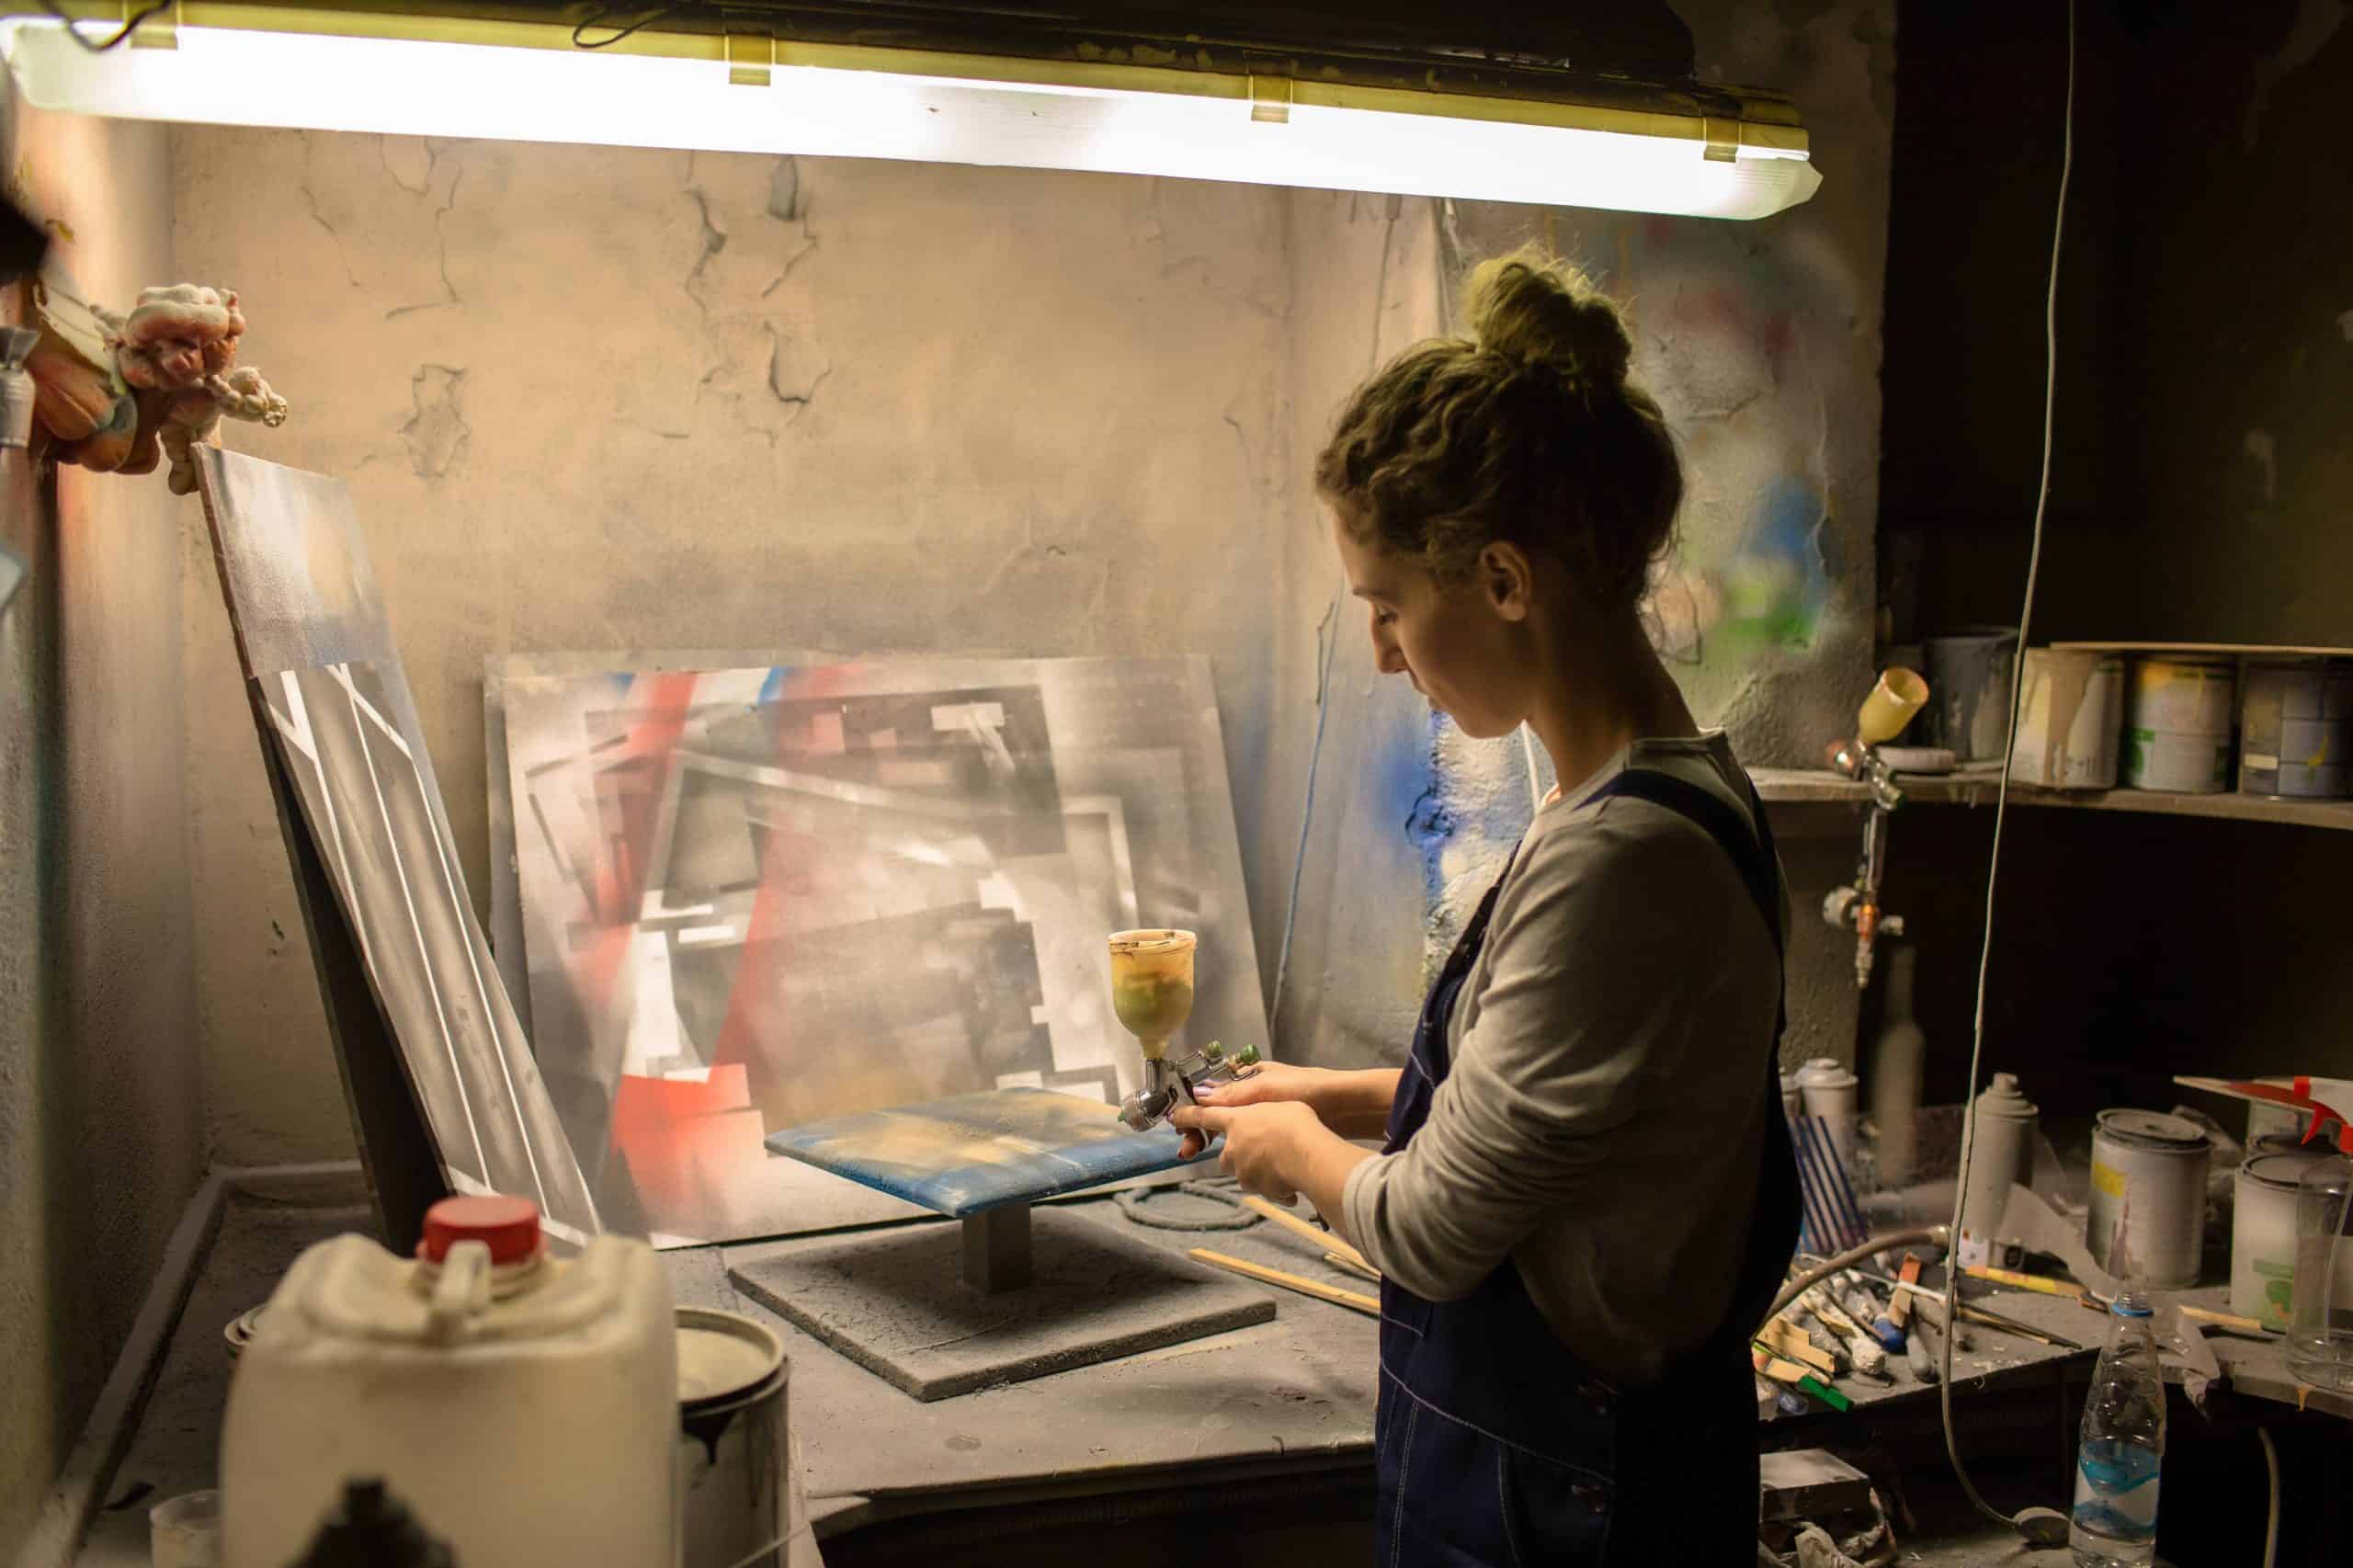
To get started, you need to collect the right materials. An airbrush gun, hoses, an air compressor, and various paints and stencils are all essential. It’s important to invest in quality tools so you can get precise, even art.
Familiarize yourself with the basics of airbrushing techniques. You need to learn how to control air pressure, distance from the canvas, and paint consistency. This will help you create different effects and textures.
Experimenting is how you master airbrushing painting. Try different paint mixtures, brush sizes, and stencil designs to find what works best for you. Don’t be afraid to make mistakes – they can lead to creative breakthroughs.
In the early 20th century, commercial illustrators often used airbrushing painting. It lets them make precise details and bright colors for advertisements and magazine covers. Now, it’s popular with artists in many fields, from automotive design to fine arts.
Don’t wait any longer. Start exploring the captivating world of airbrushing painting. With practice and dedication, you can make masterpieces that show your unique vision.
Gathering the necessary materials
- An airbrush is a must-have! Get one that fits your skill level and nozzle size. Look for a compressor with adjustable settings so you have more control.
- Paints and inks made for airbrushing are the easiest to clean and mix colors with.
- Stencils in various shapes and designs can add texture and patterns to your artwork.
- Surfaces such as canvas, paper, metal, or plastic work best with airbrushing. Experiment to find out what works best.
- To take it up a notch, learn about different paint finishes and masking techniques using low-tack tapes.
- Ready to start? Gather the materials and explore your creative potential with airbrushing painting!
Setting up your workspace
Choose a space that’s airy and breezy to avoid inhaling paint fumes. Also, get adjustable lighting, so shadows don’t interfere with your artwork. Keep all tools and materials in one place – like a box or tray. Use drop cloths to guard against spills, and if you use toxic substances, get yourself a spray booth. To make your workspace even better: use an exhaust fan, wear protective gear, clean your brushes, and consider masking techniques. Setting up the right environment will make your artistic journey smoother and more enjoyable.
Getting familiar with your airbrush
- Choose the apt airbrush. Pick one that suits your needs and preferences. Look at factors such as paint flow control, nozzle size, and pressure settings.
- Learn to put together and take apart the airbrush. Become aware of the distinct parts. Figure out how to properly assemble it for painting and disassemble it for cleaning.
- Understand the need to adjust the pressure according to your painting requirements. Test out different pressures to get the desired outcome.
- Start practicing basic techniques. These include controlling paint flow, making gradients, and getting smooth lines. Progress to more complex methods when you feel confident.
- Clean your airbrush frequently. Clean it after every use to stop clogs and get optimal results. Follow the manufacturer’s instructions for cleaning.
- Also, each airbrush model may have specific features or instructions that you should be aware of. Read the user manual or ask for help from experienced artists to understand your airbrush model.
An example of why you must understand your airbrush is the story of a novice who didn’t maintain their equipment. They used a bad nozzle and ruined their artwork due to uneven paint distribution. This was a lesson about understanding one’s tools before starting complex projects.
So, it’s essential to get familiar with your airbrush. This will help you utilize its full potential and boost your airbrushing skills. With practice and patience, you’ll soon be comfortable using your airbrush as an effective tool for creating awesome art.
Preparing surfaces for airbrushing
To get ready for airbrushing, follow these 5 steps:
- Clean the surface. Use a mild detergent and a soft cloth or sponge to clean off dirt, dust, or grease.
- Sand the surface. If it is rough or uneven, sand it with fine-grit sandpaper to make it smooth.
- Fill in any cracks or holes with putty or spackling compound. Sand the filled areas when they are dry.
- Apply a layer of primer designed for airbrushing. It keeps paint stable, increases adhesion, and improves color consistency.
- Check for any remaining imperfections. If needed, redo steps 3 & 4 for a perfect surface to airbrush.
Different surfaces may need special preparation. Metal and plastic surfaces require special primers to adhere well.
Airbrush Tutor (source) experts say that proper preparation will make your artwork last longer. It will help the paint adhere and you’ll get a professional finish.
Mixing and thinning paint
- Pick the right paint! Acrylics need water, whilst enamels can need special thinners. Follow directions from the manufacturer.
- Clean and ventilate the workspace. This will stop dust or mess spoiling the paint mix and help airflow.
- Measure each ingredient. Use a scale or cup for the paint and the thinning agent. Follow instructions for the right consistency.
- Mix it up. Pour the paint into a container, and add the thinner bit by bit as you stir constantly. No clumps or lumps!
- Test the consistency. Dip a test paper or surface in and check. It should flow easily without streaks. Make changes if it’s not right.
- Practice and experiment! You’ll find what works best for you. Some paints may have special rules about drying, temp, or work with other colors. Read the rules.
- Keep practicing! Don’t give up if success isn’t instant. Learn from mistakes and keep polishing your skills. Embrace the process and unlock your true potential!
Basic airbrushing techniques
- Master the airbrush first. Adjust the airflow and paint flow to get the desired result. Test it on scrap surfaces to see the possibilities.
- Try various strokes like dotting, lines, fades, and blends. Pressure and distance from the surface should change for each stroke. Make sure your hand is steady for accurate results.
- Layering is key in airbrushing. Start with light colors, then add a darker shade for depth. Don’t use too much paint so you won’t smudge or run.
- Regular practice makes perfect. Join online groups or attend classes to learn from experienced airbrush artists. I saw an amazing demo by Emma at an art fair where she turned a blank canvas into a beautiful landscape in minutes.
Practicing and experimenting
- Start with basic airbrush techniques. Practice spraying patterns and strokes on scrap paper or canvas. Vary the pressure, distance, and angle. Gain control and precision.
- Next, practice shading and blending. Try shapes or objects with tones and textures like fruits or fabrics. Start with a base color and add layers for depth. Use gentle strokes to blend colors together.
- Explore different surfaces and materials. Try paper, cardboard, metal, or fabric. Adjust the technique for the desired effect. Look for books, online tutorials, or workshops for further guidance.
- Now for a true story! A young artist started airbrush painting as a hobby. With practice and experimentation, they developed a signature style that caught attention worldwide. Dedication and pushing boundaries lead to success.
- Practicing and experimenting are key to becoming an accomplished airbrush painter. Embrace the process, be open-minded, and let your imagination run wild!
Troubleshooting and maintenance
- Clean your airbrush after each use! Disassemble the components and use a cleaning solution designed for airbrushes. Gently scrub away paint residue or debris, rinsing and drying all parts before reassembly.
- Inspect the nozzle regularly for signs of damage or wear. A damaged nozzle can cause uneven spray patterns or leakage. If needed, replace it with a compatible one.
- Monitor the air pressure while airbrushing. Too high or too low can cause overspray, spattering, or poor paint flow. Adjust according to the project requirements and refer to the manufacturer’s guidelines.
- Lubricate moving parts like trigger mechanisms or needle joints on occasion. This helps ensure smooth movement and prevents sticking or jamming.
- Store your airbrush in a clean, dust-free environment. Avoid extreme temperatures or direct sunlight, as these can affect performance.
By following these maintenance steps, you can protract your airbrush’s lifespan and achieve consistent results. Pay attention to detail and enjoy stunning artwork!
Conclusion
In conclusion, airbrushing painting is a creative and rewarding activity. Follow these steps to get started:
- Select the right airbrush and paint
- Practice techniques
- Explore your creativity
It’s also beneficial to join other artists and take classes. This will give you the chance to learn and grow. Plus, try out different surfaces and objects to broaden your artistic vision.
To take it further, buy quality materials and tools. This will give you better results and they’ll last longer. Also, keep your equipment in good condition. Check out the styles and techniques of well-known airbrush artists for inspiration.
Frequently Asked Questions
Q: What is airbrushing painting?
A: Airbrushing painting is a technique that involves using an airbrush tool to spray paint onto various surfaces. It allows for precise control and can create smooth gradients, fine details, and realistic effects.
Q: How do I choose the right airbrushing equipment?
A: When getting started with airbrushing, it’s important to choose the right equipment. Consider factors such as the type of paint you’ll be using (water-based or solvent-based), the desired level of detail, and your budget. Research different airbrush models and consult with experienced artists or art supply stores for recommendations.
Q: What materials do I need to begin airbrushing painting?
A: To get started, you’ll need an airbrush tool, an air compressor, paints suitable for airbrushing, a paint palette, cleaning supplies (such as airbrush cleaner and brushes), and appropriate surfaces to paint on (such as canvas or illustration boards).
Q: How should I prepare before airbrushing?
A: Before starting an airbrushing project, ensure that your workspace is well-ventilated and protected from overspray. Clean your airbrush thoroughly to remove any residue, and practice spraying on a scrap piece of paper or surface to get familiar with the equipment and adjust the air pressure, if necessary.
Q: What are some airbrushing techniques for beginners?
A: Beginners can start with basic techniques like creating smooth gradients, practicing control over the airbrush tool, and trying different stencils for designs. It’s also helpful to practice with different levels of paint dilution to achieve various effects.
Q: Are there any safety precautions when airbrushing?
A: Yes, there are some safety precautions to follow. Always work in a well-ventilated area or use a respirator mask to avoid inhalation of paint fumes. Protect your eyes with safety goggles and wear gloves to prevent direct contact with the paint or cleaning chemicals.
Subject: How to get started with airbrushing painting
Company: Hollywood Connections Center
Network: MyHollywoodPage.com
The Hollywood network of arts and creative professionals.

