


Tips for using the rule of thirds
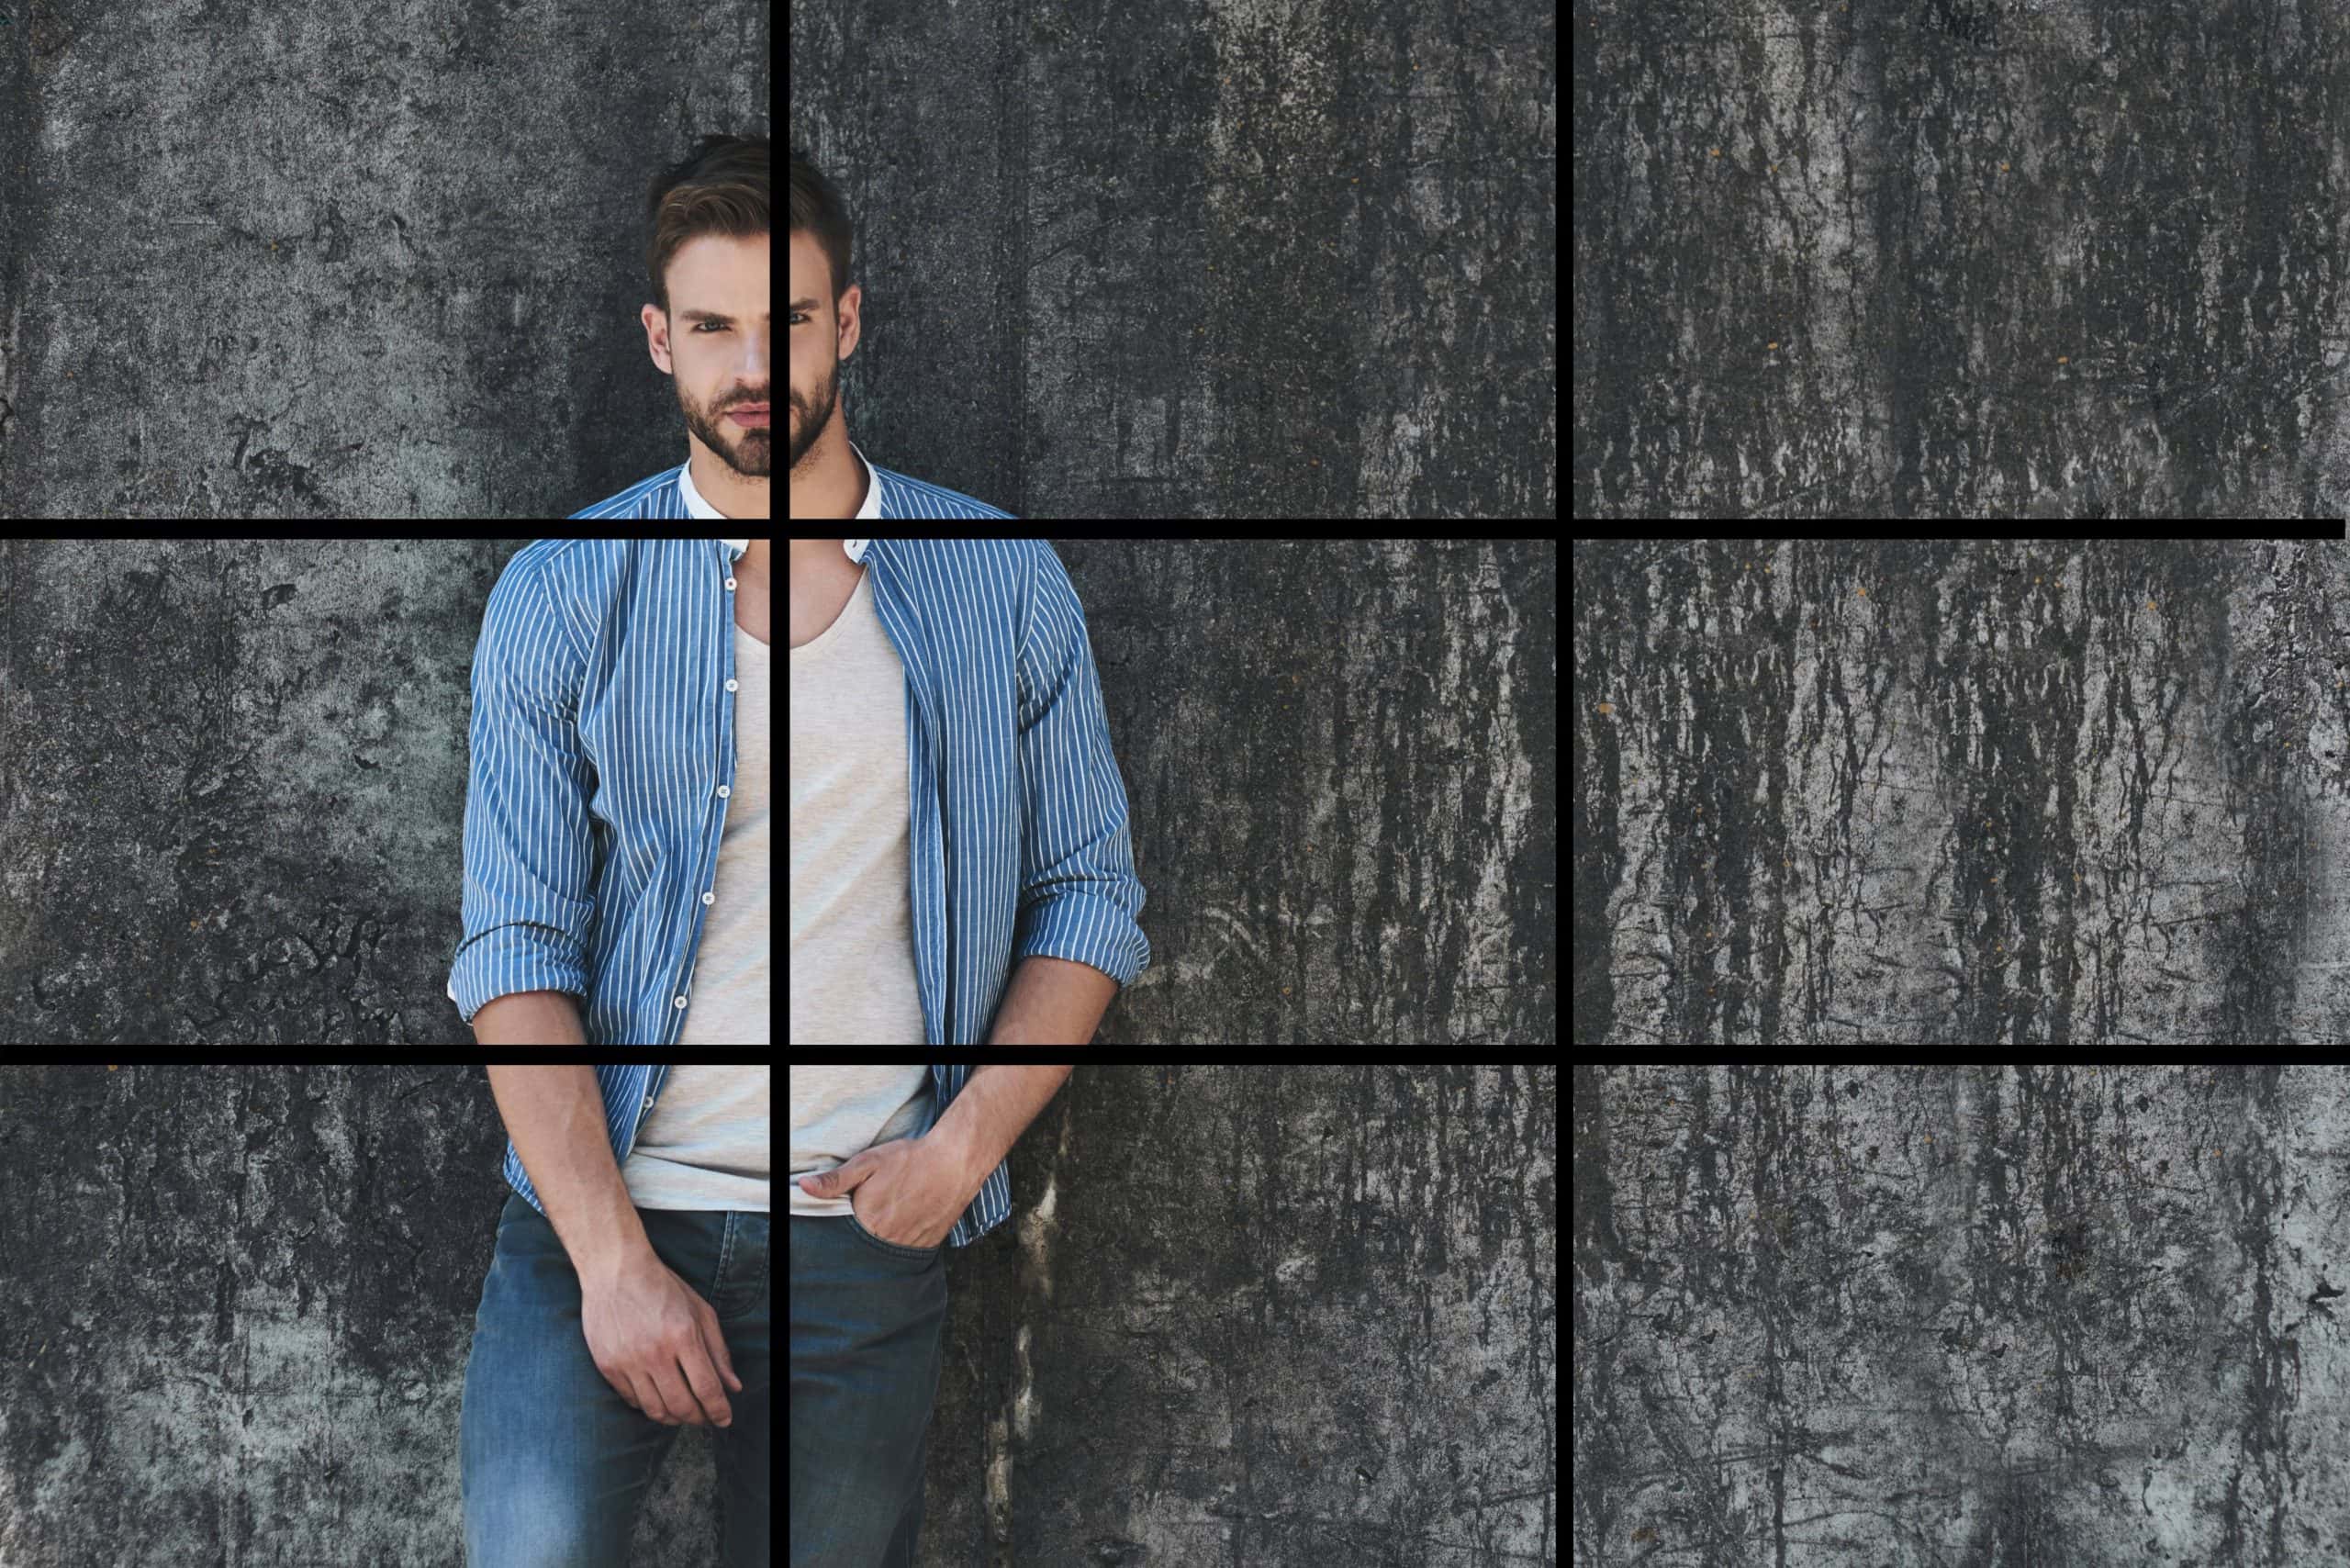
The rule of thirds is an important concept in photography. It divides a frame into nine equal parts with two horizontal and two vertical lines. Subjects should then be placed along these lines or at their intersections. This can create balance, harmony, and interest.
Our eyes are often drawn to the intersections, rather than the center. Placing a subject off-center can add drama and space. This works well for landscapes, portraits, and still-life scenes.
You can also use this approach to align other elements in the frame. For example, guide viewers’ gaze with lines along one of the vertical or horizontal lines. Or place the horizon line along one of the lines for more pleasing landscapes.
This idea dates back to Ancient Greece. Artists then applied it to their work, creating balanced and captivating compositions. Today, it is used by photographers seeking better images.
Next time you’re shooting, remember the rule of thirds. It can improve the visual impact and overall quality of your photographs.
Understanding the concept of the rule of thirds
The rule of thirds is a key concept in photography and design. It means splitting up an image into nine parts by two horizontal and two vertical lines, forming a grid with four points – the so-called “power points.” Placing important elements of the composition along these power points creates balance, and visual interest, and guides the viewer’s eye.
To make photos or designs more dynamic and eye-catching, place the subject off-center, along one of the gridlines, or at an intersection point. Also, align other elements with the gridlines, such as the horizon in a landscape shot.
Negative space can be used strategically too. This refers to areas that are empty or lack detail. It can focus attention on the subject, making it stand out more.
Finally, don’t forget about leading lines. These elements like roads, fences, or pathways naturally draw the viewer’s eye. Align them with a vertical or horizontal gridline to create a strong sense of direction.
Benefits of using the rule of thirds in photography
The rule of thirds in photography has many advantages. Splitting the image into nine equal parts and placing your subject off-center can create a striking composition. It also helps to draw the viewer’s eye towards the subject with leading lines. Additionally, it can help to highlight important elements and provide perspective. Plus, it makes taking captivating landscape or architectural shots easier. Pros swear by this technique!
It’s essential to consider balance within each section of the frame. This will bring harmony and captivate people’s attention. Studies have revealed that photos following the rule of thirds look better than those that don’t.
Tips for applying the rule of thirds:
The rule of thirds is a basic principle in design and photography to improve a picture’s composition. Divide the frame into nine equal parts with two vertical and two horizontal lines.
Here are some tips:
- Enable the grid feature on your camera or imagine it when you shoot. Put elements or points of interest on the gridlines or at their intersections (power points). This will add visual appeal and balance.
- Don’t place your subject dead center in the frame. Move it slightly off-center along one of the gridlines for more dynamism and to draw attention to other parts of the image.
- Look at both the subject and its surroundings. If there’s an interesting background or foreground, put it along one of the gridlines for balance and depth.
These are just suggestions. Follow your artistic instincts to capture unique images. To further understand, use leading lines that guide viewers’ eyes. Align them with one of the gridlines to increase the photograph’s impact. Also, use negative space around the main subject or focal point. Place important elements against negative space aligned with one of the gridlines to achieve balance, highlight the subject, and create emotion.
Mastering compositional techniques takes practice. The rule of thirds is one tool. Explore other principles and let your vision guide you to capture remarkable images with a captivating story.
Examples of successful photographs using the rule of thirds
A successful photograph is one that effectively employs the “rule of thirds.” This technique divides the image into nine parts with two equally spaced horizontal and vertical lines. Placing elements along these lines or at their intersections adds interest to the image and directs the viewer’s focus.
Balancing elements across the grid helps create a sense of harmony. Leading lines that intersect with the gridlines can also enhance the composition. Incorporating negative space can draw attention to the subject. Placing elements that provide context along one of the vertical gridlines helps to tell a story. And layering within each section adds depth and dimension.
It’s important to consider lighting, color, and timing too. These suggestions help create a visually balanced image and guide viewers through it in an engaging way. Mastering the rule of thirds can take photographs to new creative heights.
Common mistakes to avoid when using the rule of thirds
Use the rule of thirds to improve the composition of your photos. But, be wary of some common errors when doing so.
- Don’t put your subject in the middle of the frame. This makes a composition unappealing. Instead, position it along one of the imaginary lines or at one of the intersections made by the rule of thirds.
- Don’t forget the background. It is easy to focus on a subject’s placement and miss what is behind it. Remember to check the entire frame and make sure the background complements the subject.
- Don’t use the rule of thirds rigidly. It’s a helpful tool, not a requirement. Try different placements and compositions to find what works for a specific scene.
Also, think about leading lines or patterns. These guide viewers’ eyes through a photo and give it depth.
For more flexibility, if you don’t get the picture just right, use post-processing software to crop and align it according to the rule of thirds.
By avoiding mistakes and exploring details, you can create fantastic photos with the rule of thirds. Mastering this technique takes practice and experimentation, so keep refining your skills.
Conclusion and final tips for mastering the rule of thirds
The rule of thirds is essential for photography. Mastering it brings great improvements to your images. To help you master it, some key points to keep in mind:
- Imagine a grid of nine sections. Place two horizontal and two vertical equally spaced lines. Put main subjects/points of interest along these lines or at their intersections. Doing this will create a more balanced and interesting composition.
- Aim for a balanced distribution of elements throughout the image. Don’t overcrowd one section and leave others empty.
- The rule of thirds isn’t set in stone. Feel free to experiment and break it when needed. Dead center placement can have a strong effect or emphasize importance.
- Be aware of backgrounds that distract from the subject. Clutter and busyness can take away from the impact. Simplify the backdrop or blur distractions with depth-of-field techniques to focus attention on the subject.
Remember these tips to master the rule of thirds: Align subjects to the gridlines, balance elements, experiment when possible, and minimize distractions. With practice, you can create amazing compositions that capture viewers’ attention.
Frequently Asked Questions
1. What is the rule of thirds?
The rule of thirds is a compositional guideline that divides an image into nine equal parts using two horizontal and two vertical lines. The main subject of the image should be placed along these lines or at their points of intersection.
2. Why should I use the rule of thirds?
Using the rule of thirds helps create more visually pleasing and balanced compositions. It adds interest and draws the viewer’s attention to the main subject. By placing key elements along the lines or intersections, it enhances the overall composition.
3. How can I apply the rule of thirds in my photography?
To apply the rule of thirds, imagine a grid overlaying your scene with two equally spaced horizontal and two equally spaced vertical lines. Position the main subject at the intersections or along these lines. Many cameras and smartphone apps have a grid overlay feature that can assist you in composing shots using the rule of thirds.
4. Are there exceptions to using the rule of thirds?
While the rule of thirds is a valuable guideline, it is not a strict rule. There are times when breaking the rule of thirds can result in more dynamic or creative compositions. Experimentation is key, and sometimes placing the subject dead center or at different points in the frame can create unique and powerful images.
5. Can the rule of thirds be applied in post-processing?
Yes, you can also apply the rule of thirds while cropping or editing your images in post-processing software. Many editing tools provide grid overlays that allow you to align and adjust the composition according to the rule of thirds, even if you didn’t initially compose the shot using this guideline.
6. Are there other compositional techniques similar to the rule of thirds?
Yes, there are other compositional techniques such as leading lines, symmetry, and framing that can complement or even be combined with the rule of thirds. These techniques help guide the viewer’s eye and create visually appealing photographs.
Subject: Tips for using the rule of thirds
Company: Hollywood Connections Center
Network: MyHollywoodPage.com
The Hollywood network of arts and creative professionals.

